


In 2008 I moved into a new condo and wanted to make something really cool out of it. I batted around a few ideas for a mural to paint on the living room wall, but one thing was certain: it needed to be big. I had just painted a mural for a local community center and was riding high on some new-found confidence in my painting ability. I’ve always been more into drawing, liking the control of pencil and ink over messy brushes and paint.
Picasso’s Guernica became the project. To recreate the modern art masterpiece. Breaking down the original into little pieces—like a mechanic taking apart a car, seeing how it all fits together, and then building it back up—was an amazing process.
From Wikipedia: “Guernica is a painting by Pablo Picasso. It was created in response to the bombing of Guernica, Basque Country, by German and Italian warplanes at the behest of the Spanish Nationalist forces, on 26 April 1937, during the Spanish Civil War. The Spanish Republican government commissioned Picasso to create a large mural for the Spanish display at the Paris International Exposition at the 1937 World’s Fair in Paris. Guernica shows the tragedies of war and the suffering it inflicts upon individuals, particularly innocent civilians. This work has gained a monumental status, becoming a perpetual reminder of the tragedies of war, an anti-war symbol, and an embodiment of peace. On completion Guernica was displayed around the world in a brief tour, becoming famous and widely acclaimed. This tour helped bring the Spanish Civil War to the world’s attention.”
A look at my process recreating Picasso’s Guernica…
Picasso’s original artwork

PLANNING
To make it simple I distilled the original painting down in Photoshop to black, white, and a few shades of gray. I added the extra bit on the left to fill out the rest of the wall on the other side of a doorway.

An outlines-only version was made into a transparency and projected onto the wall. The little green boxes show where wall sockets are. The grid helped to position the image precisely.

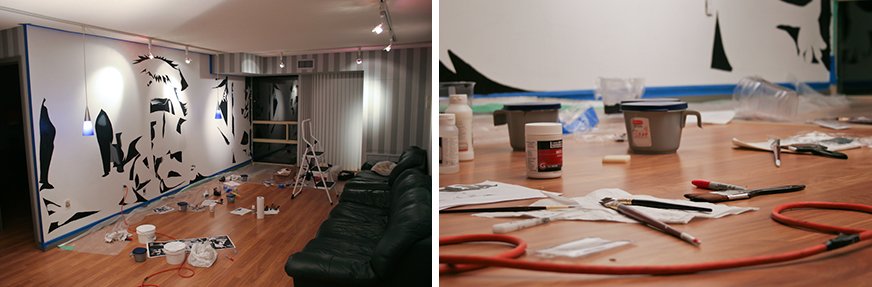
My apartment, primed and ready. My crappy old couch. I borrowed the overhead projector from my sister, a public school teacher. It’s handy to know people.


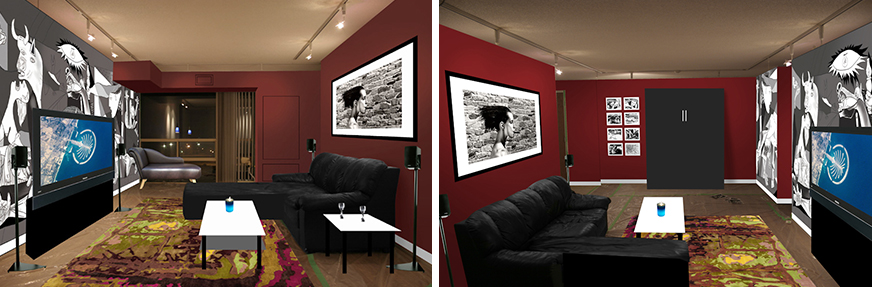
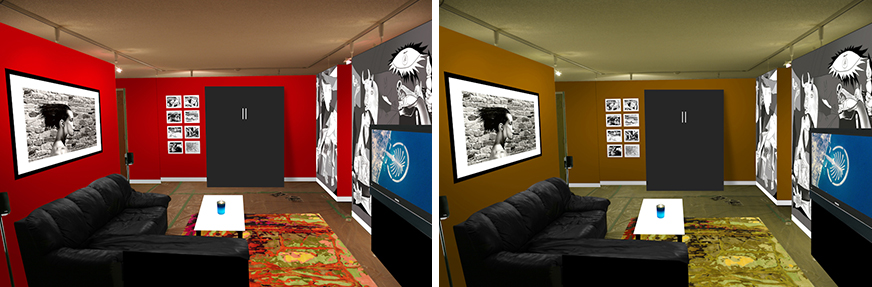
PRE-VISUALIZATION
Along with the mural itself, it was quite a task to design the apartment around the painting. I created these pre-visualizations in Photoshop to see what worked and what didn’t. Colours and graphics (like the TV, speakers and Guernica itself) were superimposed over shots of the empty apartment.
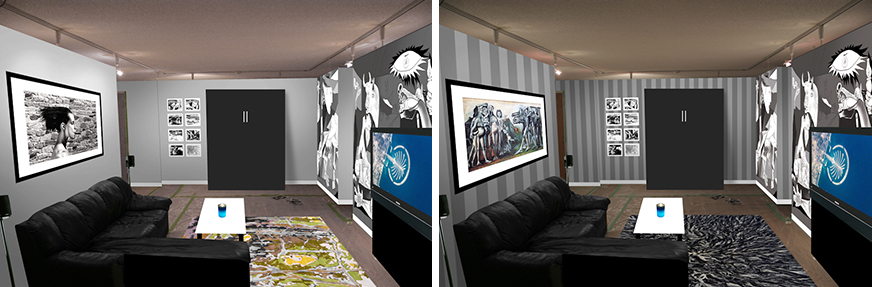
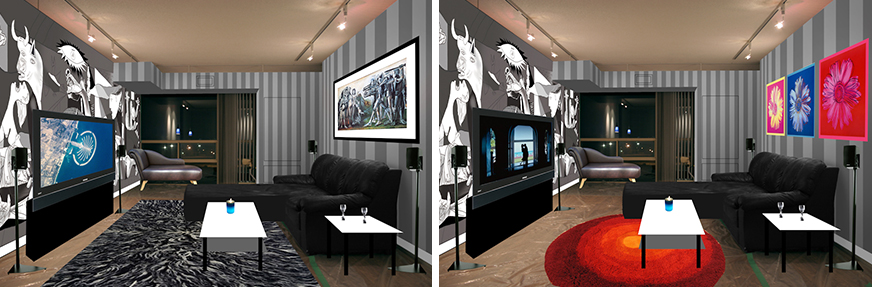

STRIPES, STRIPES, STRIPES…
I settled on the last colour scheme. The stripes were almost as difficult to pull of as the mural; some parts of the apartment aren’t perfectly parallel, I regretfully discovered. Where one doorway stood at 90°, the next one might have been at 91°. I had to gradually angle the lines for it to mesh nicely. A mountain of tape was used to mask off the lines when it came time to paint.

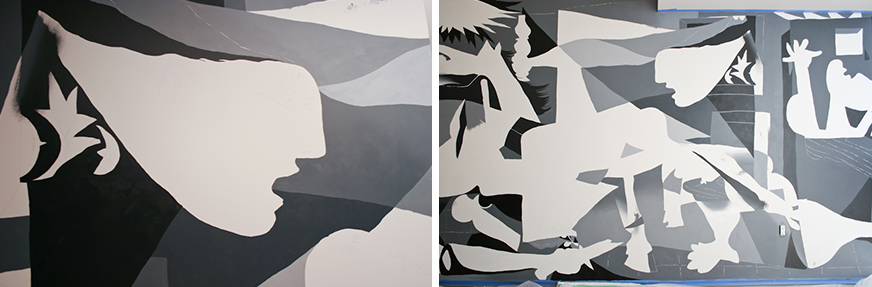
TONAL BREAKDOWN
Here’s a look at the tonal separations I had made in Photoshop. I painted one tone at a time, starting with pure black, all the way up to pure white. Since the whole thing was going to take a while I picked up some air-tight Rubbermaid containers from Home Depot. The gray tones were premixed (from two huge tubs of white and black acrylic paint) into these containers.


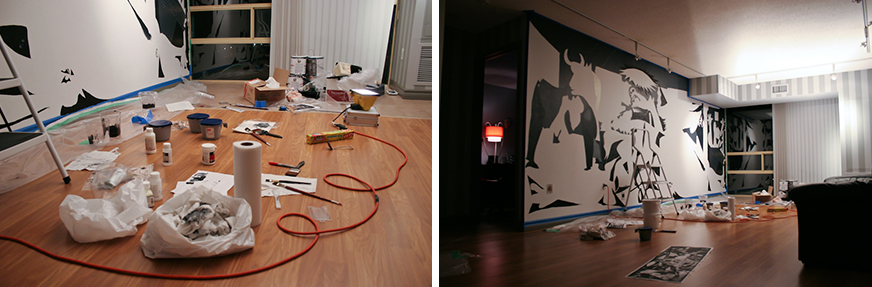
PAINTING

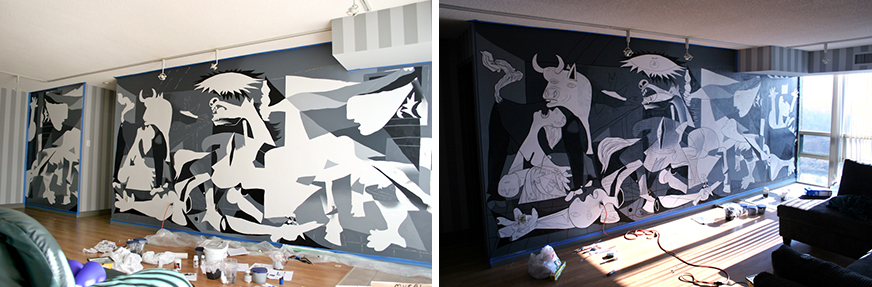
FINISHED
Another look at the finished mural. A coat of matte varnish was added to take the shine off and protect it from weathering.

A PILGRIMAGE
In September 2009 I was in Barcelona to see the ADCC World Championships. I hopped on a plane over to Madrid with the express purpose of getting a look at the real deal in person. It’s currently at the Museo Reina Sofía.


Thanks for reading!
Now this is absolutely brilliant !
Amazing!!!
You are very talented, It looks amazing! Awesome job!!
Thanks, Shannon!
Thank you for sharing this amazing journey. Accomplished, brillant and absolutely ingenious.
Thanks for the kind words, Shauna. :-)
Amazing, truly. I suddenly feel very lazy with the level of nothing that I’ve done in my new home since September. Thank you for the inspiration!
Hi, Eric. You are so talented. I loved it.
I was wondering if you could give me some tips. My students and I are going to build a 3D Guernica for a Book Fair in our school and we arethinking lots of paper mache or mdf structures. What do you think about it?
Hi Priscila,
Thanks you! I think paper mache could be very cool. I was trying to picture how you’d create a 3D version of Guernica since it’s so fundamentally flat and two-dimensional. This youtube video has a really interesting take on it, only rendered digitally: https://youtu.be/jc1Nfx4c5LQ. I’d love to see what your students come up with! Sculpture definitely isn’t my forte haha
Hey Eric! Thanks for your answer! We have thought it over and decided to do it in a flat perspective. We are going to hang each element individually. It will happen in September and I´ll send you pics once it´s done. Tks